Wednesday, July 20, 2011

[Servers] Setup and provide basic Chat Server using Openfire

Hi Friends,
Openfire is an opensource, cross-platform chat server which uses XMPP (also called Jabber). It has a very simple installation procedure, easy to use web based Admin panel. In this post I will install openfire on Windows, configure it with LDAP, Use it with Web Chat Client Spark and Desktop Client Pidgin.

Openfire can be downloaded from http://www.igniterealtime.org/projects/openfire/ in form of executables containing JRE and just archives. Download and extract archive to a directory lets say D:/pFiles/openfire.


All the required documentation is available in documentation directory. To complete installation we need to setup
  1. Database
  2. LDAP Server (optional, but recommended)
For the database use one of these supported databases
  • MySQL
  • Oracle
  • Microsoft SQLServer
  • PostgreSQL
  • IBM DB2
  • HSQLDB
After database server installation create a database lets say openfire.
And for LDAP, please refer this post to setup OpenDS. Any LDAP can be installed and used.
Now when we have LDAP and Database ready, we are ready to setup Openfire.
Go to bin directory and run openfire.exe It will show that server is running and the address:port where admin console is running.


Now open browser and go to the link provided.. in this case http://127.0.0.1:9090 which will open the web-setup


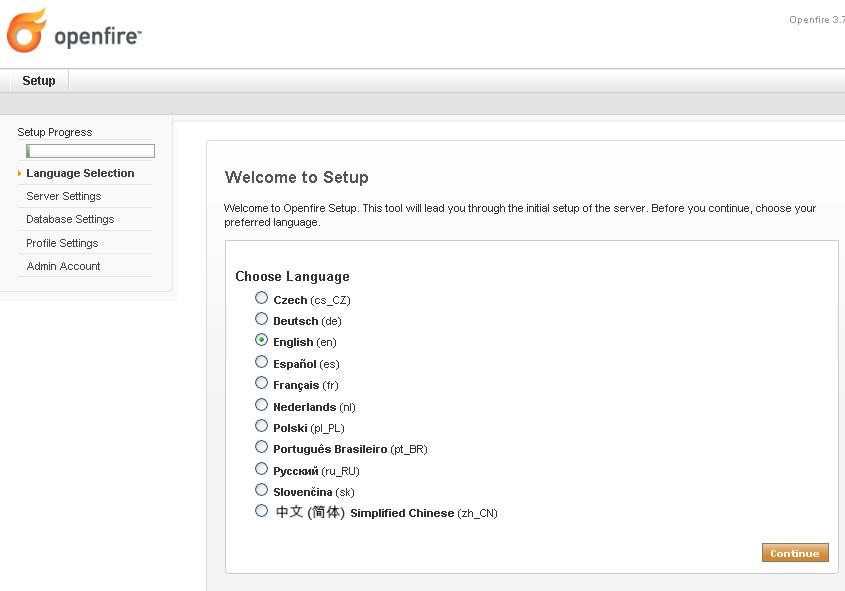
Select the language and continue..


Select the server settings for our Openfire chat server.. provide the domain name which you want to choose. This domain will be used while login... for user ravi it ravi@rkg.test will be the login username.


We have an option to choose embedded database or use our own database server. Lets go for Standard connection.


Provide the correct details in the form and continue..


We can here select where we want to store the users data. I recommend LDAP since every organization has one LDAP and the same can be integrated and used easily. Remember that.. Users and groups are stored in the directory and treated as read-only. We can not modify anything using Admin console here.

Press continue to get form to fill the LDAP credentials and other details.


We can also test connection settings using Test Settings Button.


Press Save and Continue to see user mappings. Change according to the LDAP you have. For my system I took all default so no need to change anything.


Same is the case for Group settings..


After filling all correct settings press Save and Continue. Next we should add one admin account to manage admin console. Add a user in next screen


If we add admin it will search and show users present in ldap as well.


Select user if present and then continue. Now login to the admin console using the link http://127.0.0.1:9090/index.jsp or whatever is applicable for your system.


Now the server is running and up. We can configure any client to connect to server and chat with other users. Popular desktop clients which can be used are Pidgin, trillian, empathy etc. For web client we can use SparkWeb.
Below are the steps to add account in pidgin. Click on Manage Accounts in Account in Menu.


Now add one more account..


The account type will be xmpp. Fill correct username and password. If needed put domain as we provided earlier.. in this case it is rkg.test.


We need to modify the advance settings as well


Now after adding we can chat to other users on the server. Next few screens will show the sparkweb client which can be put in any webserver like apache and used using browser. In my case I have put it in a folder called chat and accessing with url http://rkg.test:4000/chat/SparkWeb.html. This is a flash based client which can be used on web and connects to the server we want.


Thats it for the Chat Server and Clients.. We have one chat server running now, one Desktop client configured, one web client configured.

Cheers!!!

Ravi Kumar Gupta

[Servers] Setup and provide basic LDAP Server using OpenDS

Hi Friends,
Many times we need to integrate LDAP server with our softwares for user authentication. This blog will explain how to setup a basic LDAP server on a machine using OpenDS.

For the basics, LDAP is Lightweight Directory Access Protocol more on which can be read on LDAP: Wikipedia. OpenDS is one LDAP Server which can be downloaded from this link of OpenDS.org . I will recommend to download the zip version which contains setup script.


Download and extract this to a directory lets say D:/pFiles/OpenDS. Now run setup.bat which will launch the installation..


Make sure you have already setup a proper hostname for your system. Like for me I have chosen rkg.test and put it in hosts file.
Just press next and fill server settings. Give a port number which is more than 1024; this is because ports between 0-1024(not an exact figure) are reserved and sometimes blocked in intranet. I chose 11389 for this installation. Choose the Root User DN which will be used to connect to LDAP and for all other admin tasks like create/edit/delete etc. DN stands for Distinguished Name. 


For a basic server we don't need to setup replication so just leave the options as it is in next screen.


Now fill the Directory Data, Here we will Base DN which is must when we try to connect to LDAP through our softwares. Optionally we can install sample data if we want. 
 
Click next and Review the settings.


Now finish the installation. We can here choose to run this as service, optionally.


After setup is finished Launch Control Panel. Control panel is where we can manage all the entries. Clicking on the button will prompt to fill Bind DN which is nothing but Root User DN and password.


This will connect to Control panel where we can see all the options provided to manage OpenDS.


Click on Manage Entries and we will see a new screen where we can view the tree of all the entries. We can modify/delete/add any entry.

After our all the entries are setup now we are ready to use this LDAP for any integration needed. Now the most important thing, features which OpenDS is providing to us(Probably I should have listed them before in this post, but I feel this position better since now we have a basic understanding how LDAP looks like :D)
This listing is directly copied from OpenDS.org from this page

Directory Server Features

The OpenDS directory server is an LDAPv3 compliant directory server written entirely in Java. The directory server includes the following high-level functionality:
  • Full LDAPv3 compliance (RFC 4510–4519) with support for numerous standard and experimental extensions
  • High performance and space effective data storage
  • Ease of configuration and administration

    • A highly extensible administrative framework that enables you to customize most of the features listed below.
    • An administration connector that manages all administration traffic to the server. The administration connector enables the separation of user traffic and administration traffic to simplify logging and monitoring, and to ensure that administrative commands take precedence over commands that manipulate user data.
    • A graphical control panel that displays server status information and enables you to perform basic server and data administration.
    • Several command-line utilities to assist with configuration, administration tasks, basic monitoring, and data management. The main configuration utility (dsconfig) provides an interactive mode that walks you through most configuration tasks.
  • An advanced replication mechanism

    • Enhanced multi-master replication across directory server instances
    • An assured replication feature that ensures high availability of data and immediacy of data availability for specific deployment requirements
    • Fractional replication capabilities
    • Support for an external change log that publicizes all changes that have occurred in a directory server database
  • An extensible security model

    • Support for various levels of authentication and confidentiality
    • Access to resources based on privileges
    • An advanced access control mechanism
  • Multi-faceted monitoring capabilities
  • Rich user management functionality

    • Password policies
    • Identity mapping
    • Account status notification
  • A DSML to LDAP gateway
Read and Enjoy
Cheers!!!
Ravi Kumar Gupta

Wednesday, July 13, 2011

[HTML5] Adding Text to your Canvas

Hi Friends,
My last post was just an intro to Canvas and some line drawings. Whenever I see some board, canvas I always want my name written on it.. so i tried adding some text. I will show you how can you put your name over there..

1. Select a font style, size, weight just like css properties and assign like this
c.font = "bold 20px verdana";

2. Now we have two ways to draw it.. either fill or stroke.
c.fillStyle = "#ff0022";
c.strokeText("Only Stroke", 10, 60);
and for stroke
c.strokeStyle = "#00ff00";
c.strokeText("Only Stroke", 10, 60);
Remember if you want both fill and stroke then use both ways like this-
c.fillText("Both Stroke and Filled", 10, 90);
c.strokeText("Both Stroke and Filled", 10, 90);


3. Alignment of text is alwyas important. We can align text to both verticle and horizontal directions.
For horizontal just assign any of these properties start, end, left, center, or right. For ex.
c.textAlign = "left";

For verticle assign any of these properties top, hanging, middle, alphabetic, ideographic, and bottom. For ex.
c.textBaseline = "top";


Easy.. right? And this is output when I was trying something.. :)


Cheers!!!
Ravi Kumar Gupta

Thursday, July 7, 2011

[HTML5] Canvas -Paint Your Imaginations

Hi Friends,

If we forget about the IE older versions, HTML 5 is doing great job. Though there are so many things that it offers but Canvas is what attracts me. This post might act as introduction to canvas and writing your first canvas.

1. Canvas is nothing special but one HTML5 tag just like div, p, table etc. We use it like 
<canvas height="300" id="myCanvas" width="500"></canvas>

2. Actually just adding this canvas has no use at all. Javascript is one which helps us drawing things on it but even before drawing we need some initialization.
var canvas = document.getElementById("myCanvas");
var c = canvas.getContext("2d");

We just got context from the canvas. This is 2d context using which we can draw line, circles, shapes actually anything that you can think of in 2 dimentions.

3. Now when we have context available, we can start drawing. Lets draw a line first. Assume that you have a pen and paper, now what you will do to draw a line. See the comments above each code line.. isn't that right?
// Choose a point from where you want to start. So lets go to some point(x,y).
c.moveTo(x,y);
// which point you want to go now. Lets say point(x1,y1)
c.lineTo(x1,y1);
Easy so far, huh? But wait, we have to paint it, for that we have stroke(). By default stroke will paint with black color, which we can change using strokeStyle.
c.strokeStyle = "#ff9933";
c.stroke();
Now we are done. If you were not just reading this but writing the same in any html file, there might be a line appearing on the browser :)

4. To draw an arc use
c.arc(x, y, radius, startAngle, endAngle, anticlockwise);
x, y radius are just numbers but angles are in Radians so be careful. Anticlockwise is the boolean value to specify which side to move from start angle. One example Try running this and you will know more.
c.arc(50, 50, 10, Math.PI*1, Math.PI*1.9, false);
Now see, a circle is an arc with angle 0 and Math.PI*2. Just try it.

5. Well there is more to draw but lets close this for today. In my first MSpaint class in 10th standard, we were also given this much info only. If you are curious enough to learn more like me.. go to this link otherwise wait for my next post..

Cheers!!!
Ravi Kumar Gupta